
Last Updated: July 2026 | Reading Time: 10 minutes
Quick Answer: Thermal paste fills microscopic gaps between your CPU and its cooler. When it dries out or is applied poorly, heat cannot escape efficiently. Your CPU then throttles itself to prevent damage, which makes everything slower. A fresh application of quality paste can drop temperatures by 10 to 20 degrees Celsius, depending on how bad the old paste was. Most laptops need repasting every 3 to 5 years.
The Day My Laptop Started Cooking Itself
My ThinkPad T480 was never a cool runner. It ran warm from the day I bought it refurbished in 2020. But by mid-2025, it had become genuinely unpleasant to use. The fan screamed at full speed within ten minutes of booting. The keyboard deck got hot enough that I could not rest my palms on it comfortably. Performance in Chrome was sluggish, and video calls dropped frames constantly.
I opened Task Manager. CPU usage was normal. Nothing was hogging resources. Then I downloaded HWiNFO and checked temperatures. The CPU was hitting 96°C under light load. That is dangerously close to the thermal limit for an Intel i5-8350U. The processor was thermal throttling — deliberately slowing itself down to avoid overheating.
I cleaned the fan vents with compressed air. Helped a little. Temperatures dropped to 91°C. Still terrible. Then I remembered something I had read years ago but never tried myself: thermal paste dries out. The factory paste on a 2018 laptop was now seven years old. It had probably turned into crust.
I bought a $6 tube of Arctic MX-4, watched three teardown videos for my exact model, and spent a Saturday afternoon taking my laptop apart. The old paste was indeed cracked and powdery. I cleaned it off, applied a small pea-sized dot of new paste, reassembled everything, and booted up.
Idle temperature: 42°C. Under the same light load that previously hit 96°C, it now peaked at 74°C. The fan stayed quiet. The keyboard deck was warm, not hot. I had been living with a broken laptop for months without realizing the fix was a $6 tube of goop and two hours of careful work.
That experience taught me that thermal paste is not some exotic overclocker obsession. It is basic maintenance, like changing oil in a car. And most people — myself included — ignore it until something breaks.
What Thermal Paste Actually Does
Your CPU generates heat. A lot of it. Even a modest laptop processor can produce 15 to 25 watts of heat under load. That heat needs to go somewhere, or the silicon literally melts.
The solution is a heatsink — a block of metal with fins that spreads heat across a large surface area, where a fan blows air through to carry it away. The heatsink sits directly on top of the CPU die.
Here is the problem: metal surfaces look smooth, but under a microscope they are rough and uneven. Tiny gaps and ridges prevent the heatsink from making full contact with the CPU. Air gets trapped in those gaps. Air is a terrible conductor of heat. Without something to fill those microscopic voids, heat transfer is inefficient.
Thermal paste — also called thermal compound or thermal interface material — is a viscous substance that squeezes into those gaps when pressure is applied. It is not as conductive as metal, but it is far better than air. It creates a continuous thermal bridge between the CPU and the heatsink.
Over time, thermal paste dries out. The oils and binders evaporate. The compound shrinks, cracks, and loses its ability to fill gaps. Heat transfer degrades. The CPU runs hotter. Eventually, it hits thermal limits and throttles.
That is exactly what happened to my ThinkPad. The factory paste had served its purpose for years, then quietly failed.
Signs Your Thermal Paste Needs Replacing
You cannot see thermal paste without disassembling your laptop. But you can recognize the symptoms:
Fan noise that escalates quickly. A healthy cooling system should ramp up gradually under load. If your fan hits maximum speed within minutes of opening a browser, the heatsink is struggling to dissipate heat. The fan works harder because the paste is no longer doing its job.
Hot surfaces in unexpected places. The keyboard deck above the CPU should be warm during heavy tasks. If it is uncomfortably hot during light browsing, heat is not being pulled away efficiently.
Performance drops that do not match CPU usage. If Task Manager shows low CPU usage but everything feels sluggish, thermal throttling is the likely culprit. The CPU is deliberately running slower to stay cool.
Temperatures above 85°C under normal load. Laptop CPUs are designed to run warm, but sustained temperatures above 85°C during everyday tasks indicate a cooling problem. My ThinkPad was hitting 96°C while browsing with five tabs. That is not normal.
Age. If your laptop is more than four years old and has never been repasted, the paste is almost certainly degraded. Factory paste is usually adequate but not premium. It is designed to last the warranty period, not a decade.
What You Need to Repaste a Laptop
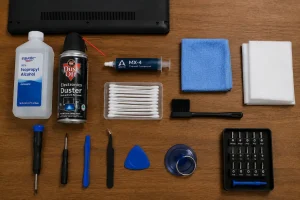
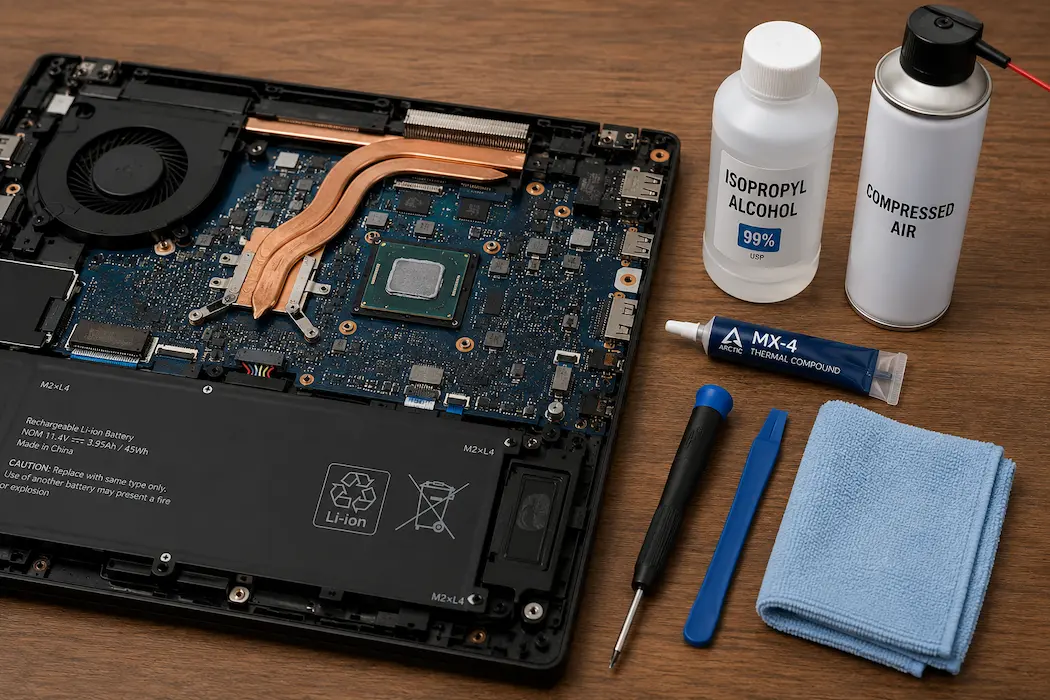
This is not an expensive project. Here is what I gathered:
- Thermal paste: Arctic MX-4, Noctua NT-H2, or Thermal Grizzly Kryonaut. A small 4-gram tube costs $6 to $12 and covers multiple applications. Do not use toothpaste, peanut butter, or any internet joke substitute. I used Arctic MX-4 because it is widely available, easy to apply, and performs well without being exotic.
- Isopropyl alcohol: 90% or higher concentration. Lower concentrations leave residue. I used 99% from a pharmacy. About $3.
- Lint-free cloths or coffee filters: For cleaning old paste. Do not use paper towels — they leave fibers. Coffee filters work surprisingly well and cost nothing if you already have them.
- Small Phillips screwdriver: For opening the laptop. Usually a #0 or #1.
- Plastic opening tools: For prying clips without scratching. An old credit card works in a pinch.
- Compressed air can: For cleaning dust from the fan and heatsink fins while you have the laptop open.
- A clean, well-lit workspace: You will be handling tiny screws and delicate components. Good lighting prevents dropped screws and damaged connectors.
Total cost: under $15 if you already have screwdrivers. Under $25 if you need to buy tools.
Before You Start: The Hard Truth
Repasting a laptop is more involved than upgrading RAM. You need to remove the bottom cover, disconnect the battery, remove the heatsink assembly, clean both surfaces, apply new paste, and reassemble. For some laptops, this is straightforward. For others, it requires removing the motherboard entirely.
Before you buy paste or tools, search for a teardown video of your exact model. Watch it fully. If the process involves removing the display, desoldering components, or navigating a maze of ribbon cables, consider whether you are comfortable with that level of disassembly. If not, a local repair shop can do this for $40 to $80. It is still worth it.
My ThinkPad T480 required removing the bottom cover, disconnecting the internal battery, unscrewing the heatsink, and lifting it away. The CPU and GPU dies were exposed underneath. It was intimidating the first time, but manageable with patience. I watched the same teardown video three times before touching a screw.
The Repasting Process
Step 1: Power Down and Disassemble
Shut down completely. Not sleep. Not hibernate. Full shutdown. Unplug the charger. If your battery is removable, take it out. If it is internal, you will disconnect it after opening the bottom cover.
Remove the bottom panel screws. Keep them organized — laptop screws vary in length, and putting a long screw in a short hole can puncture the battery or motherboard. I used a magnetic tray with labeled sections.
Gently pry the bottom cover. Start from a corner and work around the edges. Plastic clips will pop free. Do not force them. If something resists, check for a missed screw.
Step 2: Disconnect the Battery
This is non-negotiable. Even with the laptop off, the battery supplies standby power to the motherboard. Accidentally shorting a component with a screwdriver while the battery is connected can destroy the motherboard.
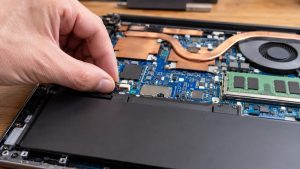
Locate the battery connector. It is usually a wide ribbon cable or a small plug near the battery edge. Gently disconnect it. Some connectors have a locking tab you must lift first. Check your teardown video for the exact mechanism. Do not yank.
I was nervous about this step. The connector on my ThinkPad was small and fragile. I used a plastic opening tool to gently lift the locking tab, then slid the connector out with my fingers. It took two minutes of careful work.
Step 3: Remove the Heatsink
The heatsink is a metal assembly with copper heat pipes and a fan attached. It is screwed to the motherboard with spring-loaded screws. These screws must be removed in a specific order — usually diagonally, in stages — to avoid warping the heatsink.
Check your service manual or teardown video for the exact screw sequence. Loosen each screw a half-turn at a time, working in a star pattern, until all are free. Then lift the heatsink straight up. Do not twist or slide it. The old paste may act like glue, especially if it is dried out. Gentle upward pressure should release it.
When I lifted my heatsink, the old paste was cracked and crumbly. It looked like dried clay. Some of it stuck to the CPU die. Some stuck to the heatsink base. Both surfaces needed cleaning.
Step 4: Clean the Old Paste
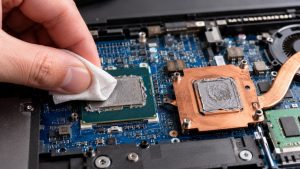
This is the most tedious part. Dampen a lint-free cloth or coffee filter with isopropyl alcohol. Gently wipe the CPU die and the heatsink base. The old paste should soften and wipe away. For stubborn residue, let the alcohol sit for 30 seconds, then wipe again.
Do not use metal tools, abrasive pads, or excessive force. The CPU die is covered by a thin metal heat spreader, but scratches can create new gaps that paste cannot fill. Be patient. It took me about ten minutes of gentle wiping to get both surfaces clean.
The goal is bare, shiny metal on both surfaces. No residue, no fibers, no dust. When both surfaces look clean and reflective, you are done.
Step 5: Clean the Fan and Vents
While the heatsink is removed, blow compressed air through the fan and heatsink fins. Years of dust accumulate here and block airflow. My ThinkPad’s heatsink fins were clogged with a dense mat of dust that looked like felt. The compressed air blasted it out in clumps. This alone probably contributed to my temperature problems.
Hold the fan blades still while blowing air. Letting them spin freely can damage the bearings. I used a cotton swab to hold the blades in place.
Step 6: Apply New Thermal Paste
This is where opinions diverge wildly. Pea method. Line method. X method. Spread method. Everyone has a favorite. I used the pea method because it is simple and works for most laptop CPUs.
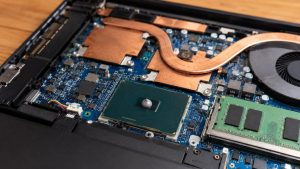
Place a small pea-sized dot — roughly 3 to 4 millimeters in diameter — in the center of the CPU die. That is it. Do not spread it. Do not use too much. When you reinstall the heatsink and tighten the screws, pressure will spread the paste evenly across the die.
Too much paste is worse than too little. Excess paste squeezes out the sides and can short nearby components. It also creates a thicker thermal barrier. A pea-sized dot is enough for a laptop CPU. For larger desktop CPUs, you might need a slightly larger dot or a thin line.
If your laptop has a dedicated GPU die next to the CPU, apply a smaller dot there too. My ThinkPad had both. I applied a tiny rice-grain-sized dot to the GPU and a pea-sized dot to the CPU.
I was paranoid about using too much. My first application looked too small. I wiped it off and reapplied. The second attempt looked right. In retrospect, the first one was probably fine. When in doubt, use less rather than more.
Step 7: Reinstall the Heatsink
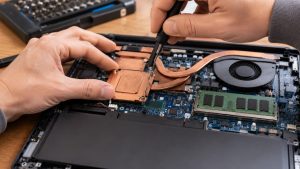
Lower the heatsink straight down onto the CPU. Align the screw holes. Do not slide it around — that smears the paste unevenly. Once aligned, start tightening screws in the reverse of the removal pattern. Diagonal, in stages, half a turn at a time. This ensures even pressure across the die.
Do not overtighten. The screws are spring-loaded for a reason. They stop when properly seated. Forcing them strips threads or cracks the motherboard.
Step 8: Reconnect and Test
Reconnect the battery. Replace the bottom cover. Reinstall screws. Power on.
The first boot might take slightly longer as the system recalibrates. Do not panic. Once Windows loads, open HWiNFO or your preferred temperature monitor. Check idle temperatures. They should be noticeably lower than before.
My idle temperature dropped from 58°C to 42°C. Under the same browsing load that previously hit 96°C, it now peaked at 74°C. The fan stayed at low speed. The improvement was immediate and dramatic.

What I Got Completely Wrong the First Time
I repasted my ThinkPad twice. The first time, I made two mistakes that partially negated the improvement.
Mistake one: I did not clean the heatsink fins. I was so focused on the paste application that I forgot to blow out the dust. Temperatures improved, but the fan still ran louder than it should have. A week later, I reopened the laptop, cleaned the fins properly, and temperatures dropped another 4°C.
Mistake two: I used too much paste on the GPU. My first application on the GPU die was generous. I thought more was better. A small amount squeezed out the side and got onto a nearby capacitor. It did not cause a short, but it was messy and unnecessary. I cleaned it up during my second disassembly and used a rice-grain-sized dot instead.
Mistake three: I skipped the battery disconnect. Not on the ThinkPad — I learned that lesson from a forum post before starting. But I helped a friend repaste his Acer Aspire and got lazy. I did not disconnect the battery. While removing a screw, my screwdriver slipped and touched a capacitor near the battery connector. Sparks. The laptop would not boot afterward. The motherboard was damaged. A $6 paste job became a $300 replacement. Always disconnect the battery. No exceptions.
How Often Should You Repaste?
There is no universal schedule. It depends on the paste quality, laptop usage, and operating environment.
Factory paste on most laptops is adequate but not premium. It typically lasts 3 to 5 years under normal conditions. If you use your laptop in a hot climate, run heavy workloads constantly, or have poor ventilation, it degrades faster.
High-quality aftermarket pastes like Arctic MX-4 or Noctua NT-H2 can last 5 to 8 years. Liquid metal compounds last longer and perform better, but they are conductive, difficult to apply, and risky for beginners. I do not recommend liquid metal for a first repaste.
My approach now: check temperatures with HWiNFO every six months. If idle temperatures creep up by more than 10°C from baseline, or if the fan behavior changes noticeably, I consider repasting. For my ThinkPad, that means probably every 3 to 4 years.
Is Repasting Worth the Risk?
For me, absolutely. My $6 tube of paste and two hours of work gave me a laptop that was pleasant to use again. I delayed replacing it by over a year.
But the risk is real. Disassembling a laptop can break things. Ribbon cables tear. Plastic clips snap. Screws strip. Motherboards short. If you are not comfortable with small electronics repair, pay a professional. The $40 to $80 a shop charges is cheap insurance against a $300+ mistake.
Also, repasting will not fix everything. If your laptop is slow because the CPU is genuinely outdated, no amount of thermal paste will make it fast. If your storage is a failing hard drive, paste will not help. Repasting fixes cooling. It does not fix aging silicon.
Related Articles
- How to Speed Up a Slow Windows Laptop
- How to Clean Your Laptop Without Damaging It
- How to Extend Your Laptop Battery Life
- RAM Explained: How Much Memory You Actually Need
- How to Upgrade Your Laptop RAM Step by Step
Sources and References
- ARCTIC. MX-4 Thermal Compound Product Specifications.
- HWiNFO. System Information and Monitoring Tool.
- Intel Support. Processor Thermal Design Power and Operating Temperatures.
- iFixit. Laptop Teardown and Repair Guides.
- Lenovo Support. ThinkPad T480 Hardware Maintenance Manual.
Samira Patel writes about tech habits and tools that actually make daily work easier. She tests everything on her own devices before recommending it. When she’s not troubleshooting laptops, she’s reorganizing her cloud storage for the fifth time.
All articles are independently researched and updated regularly. For questions or corrections, visit the Contact page.