
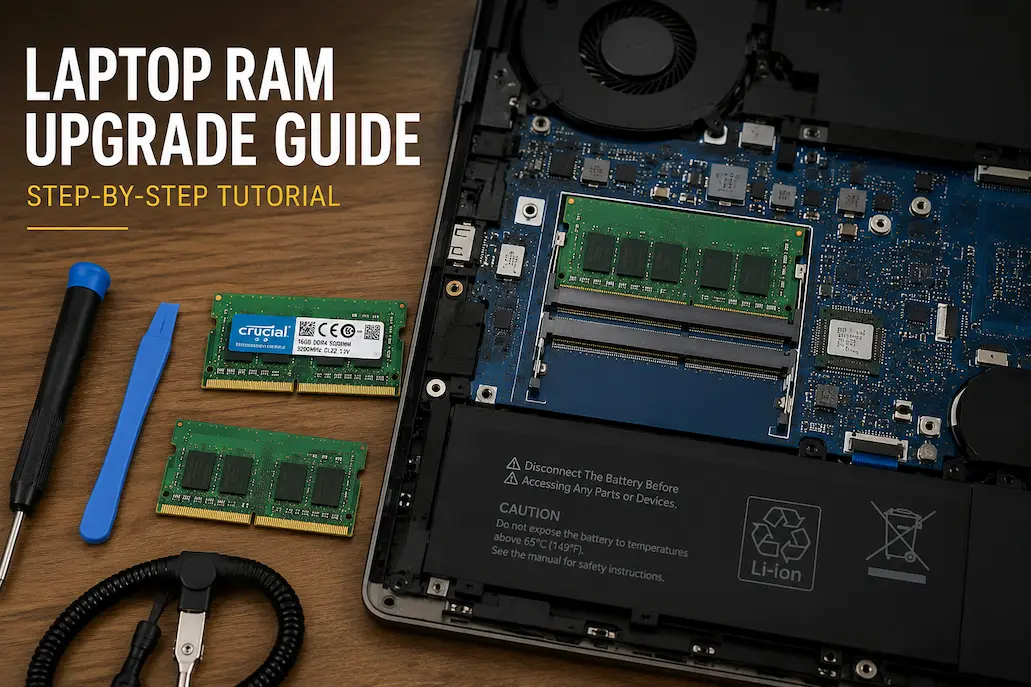
Last Updated: June 2026 | Reading Time: 12 minutes
Quick Answer: Upgrading laptop RAM involves checking compatibility, opening the bottom panel, removing old modules, installing new ones in matched pairs, and verifying the upgrade in BIOS or system settings. Most upgrades take 20-30 minutes and cost $30-80. Always ground yourself first and check your laptop’s maximum supported capacity before buying.
Why I Finally Upgraded My Own Laptop RAM
My Dell Inspiron 15 3000 was fine when I bought it in 2021. 8 GB of RAM, Intel Core i5, standard stuff. But by early 2025, it had become unusable for my actual workflow. I work with multiple browser tabs, a few spreadsheets, Slack, and occasional video calls. The laptop would freeze for 3-4 seconds every time I switched applications. Task Manager showed memory pinned at 90-95% constantly.
I considered buying a new laptop. Then I checked Crucial’s compatibility tool and realized my Inspiron supported up to 32 GB of DDR4 RAM. Two 16 GB modules cost me $68 total. The upgrade took 22 minutes from shutdown to first boot. The difference was immediate. Memory usage dropped to 45% during normal work. No more freezing. I ended up keeping that laptop for another 14 months before replacing it.
That experience is why I wrote this guide. RAM upgrades are one of the most cost-effective ways to extend a laptop’s life. But the process intimidates people unnecessarily. This article walks through every step I followed, including the mistakes I almost made.
Before You Buy Anything: Check These 4 Things
Buying the wrong RAM is the most common and expensive mistake. You cannot just buy “16 GB of RAM” and hope it fits. Here is what you need to verify first.
1. Is Your RAM Soldered or Replaceable?
Some laptops, especially ultrabooks and MacBooks, solder RAM directly to the motherboard. You cannot upgrade these. Period. Check your laptop’s service manual or search “[your model] RAM upgrade” to confirm. If you see phrases like “soldered memory” or “not user-upgradeable,” stop here. You need a new laptop, not new RAM.
My Inspiron had a removable bottom panel with two SO-DIMM slots visible immediately. Some laptops hide RAM under the keyboard or require removing the entire motherboard. Know your specific model before buying tools or modules.
2. What Type of RAM Does Your Laptop Use?
Laptops use SO-DIMM modules, which are smaller than desktop RAM. But beyond that, you need to match:
- Generation: DDR3, DDR4, or DDR5. These are not interchangeable. DDR4 slots physically block DDR5 modules.
- Speed: Measured in MHz (e.g., 2400, 3200, 4800). You can install faster RAM than your laptop supports, but it will downclock to the slower speed. You cannot install slower RAM than your motherboard requires.
- Form factor: SO-DIMM for laptops. Standard DIMM for desktops. Do not mix these up.
The easiest way to check is using a free tool like CPU-Z or Crucial’s System Scanner. CPU-Z’s “Memory” tab shows your current type and speed. The “SPD” tab shows what each installed module supports. I used CPU-Z and confirmed my laptop had one 8 GB DDR4-2666 module in Slot 1, with Slot 2 empty.
3. What Is Your Maximum Supported Capacity?
Every laptop has a hard limit. Mine supported 32 GB total (2 x 16 GB). Some support only 16 GB. Others support 64 GB. Exceeding this limit means the extra memory is invisible to your system. Check your manufacturer’s specifications page or use Crucial’s compatibility database.
4. Do You Have One or Two Slots?
This matters for dual-channel performance. Two modules in two slots run faster than one module in one slot. If your laptop has one 8 GB module and one empty slot, buy a matching 8 GB module. If it has two 4 GB modules and you want 16 GB total, you need to replace both with two 8 GB modules.
I had one 8 GB module and one empty slot. I considered buying one 16 GB module for 24 GB total. Then I learned about dual-channel mode. Two matched modules communicate with the processor simultaneously, roughly doubling memory bandwidth. For integrated graphics especially, this matters. I bought two 16 GB modules instead and sold the original 8 GB module for $15.
| Check | How to Verify | Tool to Use |
|---|---|---|
| RAM type (DDR3/4/5) | CPU-Z Memory tab or manufacturer specs | CPU-Z (free) |
| Current speed (MHz) | CPU-Z SPD tab | CPU-Z (free) |
| Number of slots | Open bottom panel or CPU-Z SPD tab | CPU-Z or physical inspection |
| Max supported capacity | Manufacturer website or Crucial scanner | Crucial System Scanner |
| Upgradeable or soldered | Service manual or teardown videos | iFixit or YouTube teardowns |
What You Need Before Starting
Here is everything I gathered before touching my laptop:
- New RAM modules: Two matched SO-DIMM sticks, verified compatible with my specific model
- Small Phillips head screwdriver: Most laptops use #0 or #1 Phillips screws
- Plastic opening tool or old credit card: For prying open clips without scratching
- Anti-static wrist strap (optional but recommended): Or touch a grounded metal object before handling components
- Magnetic screw tray or small containers: Laptop screws vary in length. Mixing them up can strip threads or puncture batteries
- Phone or camera: To photograph screw positions before removal
I did not have an anti-static wrist strap. I worked on a wooden table, avoided carpet, and touched my kitchen faucet before starting. It is not ideal, but it worked. If you upgrade RAM regularly, buy a $5 wrist strap.
Step-by-Step Installation
Step 1: Power Down Completely
Shut down through Windows. Do not use Sleep or Hibernate. Wait until all lights are off and fans stop spinning. Unplug the power adapter. If your battery is removable, take it out. For internal batteries, proceed carefully. The residual charge in capacitors is minimal, but why risk it?
Step 2: Ground Yourself
Static electricity can damage RAM modules. Touch a grounded metal object — a faucet, radiator, or the metal case of a plugged-in desktop computer. Avoid working on carpet. Work on wood, tile, or a hard surface.
Step 3: Open the Bottom Panel
Most laptops have a removable bottom panel secured by screws. Some have a single “upgrade hatch” covering just the RAM and storage slots. Others require removing the entire bottom cover.
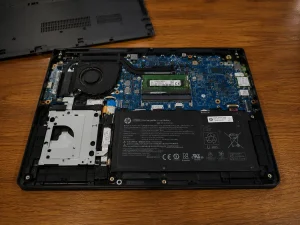
My Inspiron had a small rectangular hatch held by one screw. I removed it and the RAM slots were immediately visible. If your laptop requires removing the entire bottom cover:
- Place the laptop face-down on a soft cloth
- Photograph the screw layout before removing anything
- Remove all bottom screws and organize them by position
- Gently pry the bottom cover starting from a corner using a plastic tool
- Work slowly. Plastic clips snap if you rush
Step 4: Locate the RAM Slots
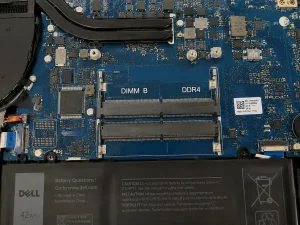
RAM slots are long, thin slots with metal clips on both ends. They are usually near the center of the motherboard, away from the battery and cooling fan. You will see one or two modules already installed, or possibly one empty slot.
Before touching anything, photograph the current module orientation. Note which side the notch faces. This helps if you need to reinstall the old RAM later.
Step 5: Remove the Old RAM Module
Each RAM module is held by two metal clips, one on each end. Gently push both clips outward simultaneously. The module will pop up at a 30-degree angle. Do not force it. The clips should release with light finger pressure.
Once the module pops up, grasp it by the edges — never touch the gold contacts or the chips on the module. Pull it straight out at the same 30-degree angle. Do not bend it. Store the old module in anti-static packaging if you plan to sell or reuse it.
I was nervous during this step. The clips felt fragile. But they are designed for repeated use. Push gently and evenly. If one side releases before the other, the module tilts. That is normal. Just keep pushing the second clip until both are open.
Step 6: Install the New RAM Module
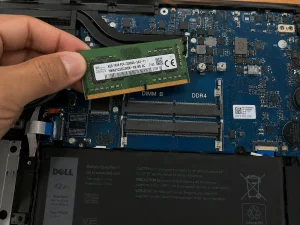
Hold the new module by its edges. Align the notch on the module’s gold contacts with the key in the slot. This prevents inserting the module backwards. The notch is off-center, so it only fits one way.
Insert the module at a 30-degree angle, matching the angle of the old module when it popped up. Push firmly but gently until the gold contacts are fully seated in the slot. You should feel slight resistance as the contacts slide in. Do not force it. If it does not slide in smoothly, check the notch alignment again.
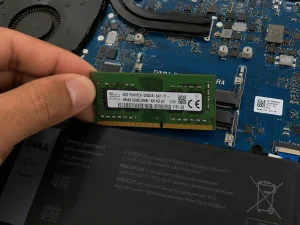
Once fully inserted, press down on the top of the module until both metal clips snap into place. You should hear a distinct click from each side. The module should lie flat and level. If one clip does not snap, the module is not fully seated. Push down more firmly or reseat it.
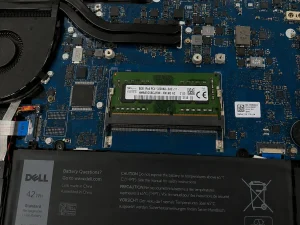
Repeat for the second module if you are installing two.
Step 7: Reassemble and Power On
Replace the bottom panel or hatch. Reinstall screws in their original positions. Reinsert the battery if you removed it. Plug in the power adapter.
Power on. Do not panic if the first boot takes longer than usual. The BIOS is detecting and configuring the new memory. This can take 30-60 seconds. My Inspiron took about 45 seconds on first boot after the upgrade, then returned to normal 12-second boots afterward.
Step 8: Verify the Upgrade
Once Windows loads, verify the new RAM is recognized:
- Press Ctrl + Shift + Esc to open Task Manager
- Click the Performance tab
- Select Memory
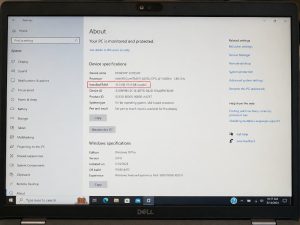
- Check that the total capacity matches what you installed
If you installed 32 GB total, you should see “32.0 GB” or close to it. Slight variations are normal due to shared video memory. If you see the old capacity, power down and reseat the modules. One clip probably did not snap fully.
I also ran CPU-Z again to confirm dual-channel mode was active. In the Memory tab, look for “Channel #” — it should say “Dual” if you installed two matched modules. Single-channel mode works but leaves performance on the table.
| Step | What to Do | Common Mistake |
|---|---|---|
| 1 | Power down completely, unplug, remove battery if possible | Using Sleep mode instead of full shutdown |
| 2 | Ground yourself by touching metal | Working on carpet without grounding |
| 3 | Open bottom panel, photograph screw layout | Losing screws or mixing different lengths |
| 4 | Locate RAM slots, note module orientation | Forcing clips instead of pushing gently outward |
| 5 | Push clips outward, remove old module at 30° angle | Touching gold contacts or bending the module |
| 6 | Align notch, insert at 30°, press down until clips snap | Inserting backward or not seating fully |
| 7 | Reassemble, power on, expect slightly longer first boot | Panicking when first boot takes 30-60 seconds |
| 8 | Verify in Task Manager and CPU-Z | Assuming it worked without checking |
What I Almost Did Wrong
Three mistakes I narrowly avoided:
Almost bought DDR3 instead of DDR4. My laptop model number was similar to a 2017 version that used DDR3. I double-checked CPU-Z before ordering. A $68 mistake avoided.
Almost installed a single 32 GB module. I thought bigger was better. But my laptop only had two slots, and one 32 GB module would have run in single-channel mode. Two 16 GB modules gave me the same capacity with double the bandwidth. For my integrated graphics, that mattered.
Almost skipped verifying dual-channel mode. After installation, Task Manager showed 32 GB. I almost stopped there. But CPU-Z revealed I had accidentally swapped the modules between slots, and the system was running in single-channel mode. Reseating them into the correct paired slots fixed it. The performance difference was noticeable in browser tab switching and light photo editing.
Troubleshooting Common Problems
Laptop Does Not Boot After RAM Upgrade
Power down immediately. Remove the new RAM and reinstall the old modules. If the laptop boots, the new RAM is either incompatible or not seated properly. Check that the notch alignment is correct. Try seating the module more firmly. If it still fails, the RAM may be defective. Contact the seller for replacement.
System Shows Less RAM Than Installed
This usually means one module is not fully seated. Power down, open the panel, and check both modules. Press down firmly until both clips snap. Also verify your laptop actually supports the installed capacity. If you installed 64 GB in a laptop that maxes at 32 GB, the extra memory is invisible.
Blue Screen or Random Crashes After Upgrade
Incompatible RAM can cause system instability even if it physically fits. Check that the speed and timings match your laptop’s requirements. Some laptops are picky about RAM brands. If crashes persist, test with one module at a time to isolate the faulty stick. Return incompatible modules and buy from a vendor with a good return policy.
Performance Feels the Same
More RAM does not speed up tasks that already fit in memory. If you upgraded from 8 GB to 16 GB but your normal usage only consumes 6 GB, you will not feel a difference. Check Task Manager’s Memory tab during your heaviest typical workload. If usage stays below 70% of your new total, the bottleneck is elsewhere — probably storage or CPU.
Is Upgrading RAM Worth It? A Quick Cost Check
| Scenario | RAM Upgrade Cost | New Laptop Cost | My Verdict |
|---|---|---|---|
| 4 GB to 8 GB on an old laptop | $25-35 | $400-600 | Worth it for basic tasks |
| 8 GB to 16 GB for multitasking | $40-60 | $500-800 | Best value upgrade available |
| 16 GB to 32 GB for heavy work | $70-100 | $800-1200 | Worth it if CPU is still capable |
| DDR3 laptop (any capacity) | $30-60 | $400+ | Consider new laptop instead |
My upgrade cost $68 and gave me 14 more months of usable life from a laptop I was ready to trash. That is roughly $5 per month. A new comparable laptop would have cost $700 minimum. The math is obvious.
But know when to stop. If your laptop uses DDR3, has a 5-year-old dual-core processor, or takes 3 minutes just to boot, RAM will not save it. At that point, the storage, CPU, and motherboard are all aging together. Upgrade the RAM if you want, but budget for a replacement within a year.
Related Articles
- RAM Explained: How Much Memory You Actually Need
- SSD vs HDD: Which Storage Type Do You Need
- How to Speed Up a Slow Windows Laptop
- How to Extend Your Laptop Battery Life
- How to Choose the Right Laptop for Remote Work
Sources and References
- Crucial Technology. System Scanner and Memory Compatibility Database.
- CPUID. CPU-Z System Information Software.
- Microsoft Support. Check Your Computer’s Memory Usage.
- iFixit. Laptop Repair Guides and Teardowns.
- Dell Support. Inspiron 15 3000 Series Documentation.
Samira Patel writes about tech habits and tools that actually make daily work easier. She tests everything on her own devices before recommending it. When she’s not troubleshooting laptops, she’s reorganizing her cloud storage for the fifth time.
All articles are independently researched and updated regularly. For questions or corrections, visit the Contact page.